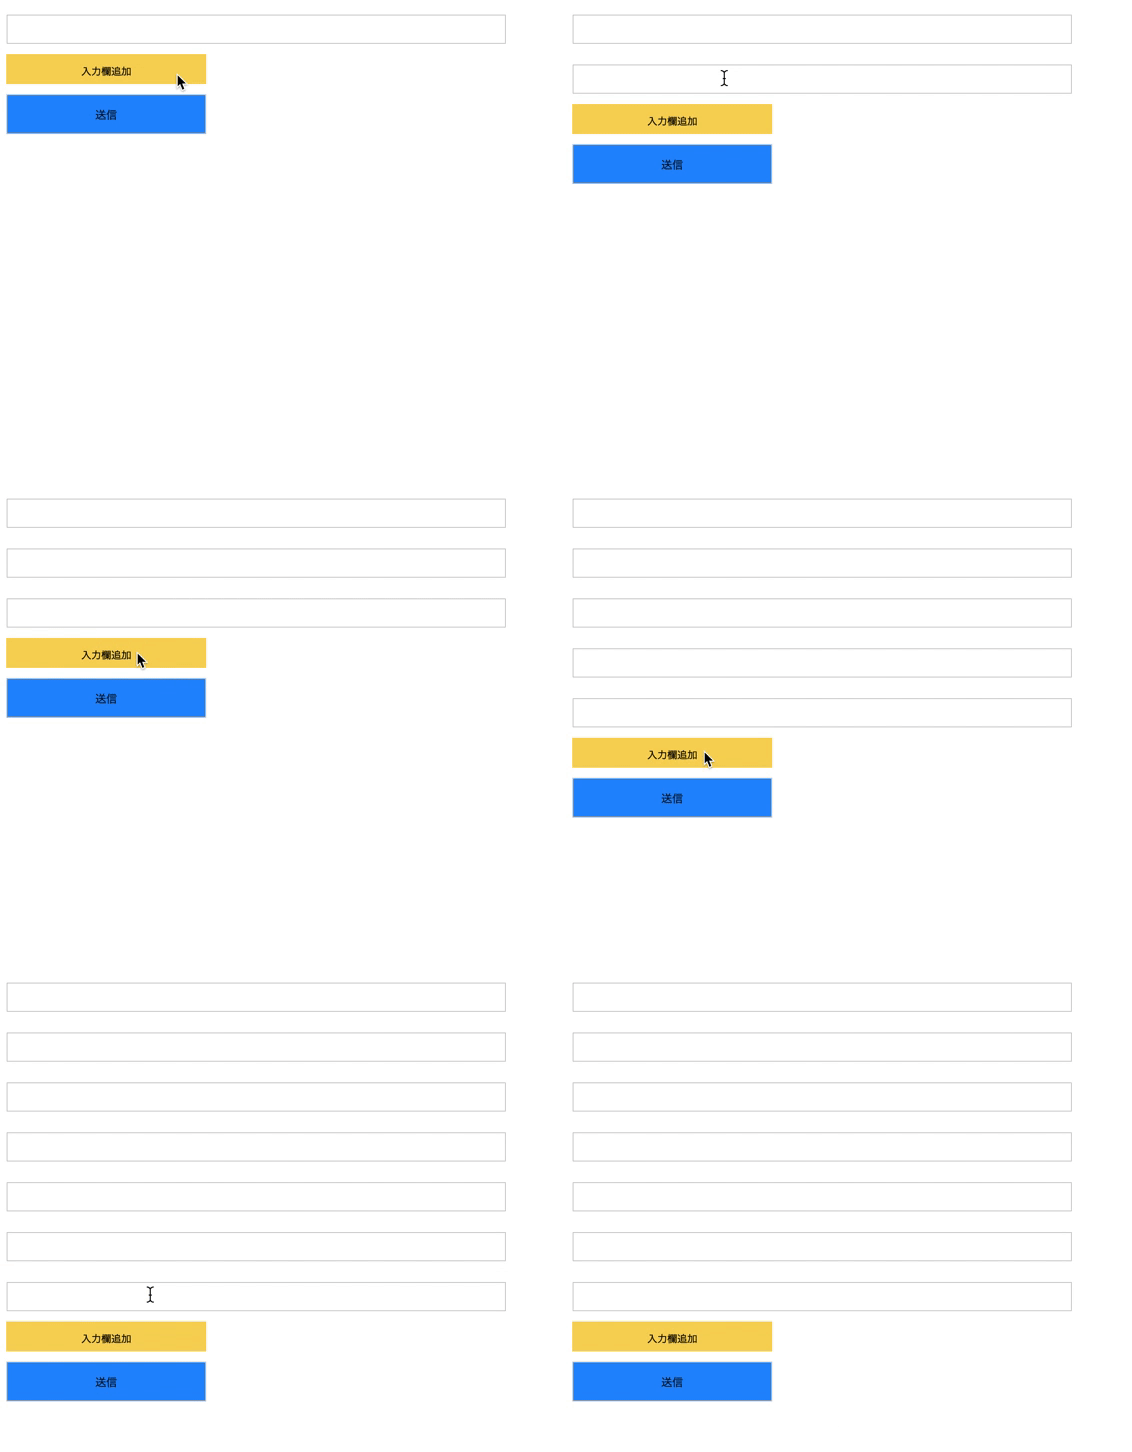
コロナ危機の中、仕事ができるのはとてもありがたいです。
本日はメモアプリに入力欄追加ボタンを実装したので、そのtipsを備忘録に残しておきます。
Contents
やりたいこと
こんな感じでボタンを押したら次々とフォームが出てくるのを目指します。

書いたコード
今回書いたメインのコードはこちらです。
Rails5.2までは、jQueryを主に使用していたのですが、せっかくRails6.0になってjQueryがデフォでなくなったので、バニラJSも学んでみようと思います。
以下バニラJSです。
document.addEventListener("DOMContentLoaded", function () {
  const addMemoBtn = document.getElementsByClassName("add-memo-form-btn")[0]
  const formList = document.getElementsByClassName("memos-form__titles")[0]
  let formNum = 0

  addMemoBtn.addEventListener("click", function() {
    formNum += 1
    const formNode = document.createElement("input");
    formNode.setAttribute("class", "memos-form__title");
    formNode.setAttribute("type", "text");
    formNode.setAttribute("name", `form_memo_collection[memos_attributes][${formNum}][title]`);
    formNode.setAttribute("id", `form_memo_collection_memos_attributes_${formNum}_title`);
    formList.appendChild(formNode)
  })
})
WebpackerでJSファイルを読み込む
まずは、Rails6.0からWebpackerが導入されたので、自分が作成するJSファイルをWebpackが読み取れるようにする必要がありそうです。
import文で読み込みしましょう。
// This file is automatically compiled by Webpack, along with any other files
// present in this directory. You're encouraged to place your actual application logic in
// a relevant structure within app/javascript and only use these pack files to reference
// that code so it'll be compiled.

require("@rails/ujs").start()
require("turbolinks").start()
require("@rails/activestorage").start()
require("channels")

import "./add-memo-form"

// Uncomment to copy all static images under ../images to the output folder and reference
// them with the image_pack_tag helper in views (e.g <%= image_pack_tag 'rails.png' %>)
// or the `imagePath` JavaScript helper below.
//
// const images = require.context('../images', true)
// const imagePath = (name) => images(name, true)
document.addEventListener(“DOMContentLoaded”
まずは大事、画面がロードされた場合のイベント作成
いきなりコードを書いてしまうと、画面が生成されるより先にJavaScriptが走るので、このイベントが必須になります。
document.addEventListener("DOMContentLoaded", function () {

 // 省略

})
ボタンクリックでイベント発火
次に、ボタンをクラス名から引っ張ってきて、それにクリックイベントを追加していきます。add-memo-form-btnというクラス名をつけているので、それを指定します。
document.addEventListener("DOMContentLoaded", function () {
  const addMemoBtn = document.getElementsByClassName("add-memo-form-btn")[0]
  const formList = document.getElementsByClassName("memos-form__titles")[0]
  let formNum = 0

  addMemoBtn.addEventListener("click", function() {
    formNum += 1
    const formNode = document.createElement("input");
    formNode.setAttribute("class", "memos-form__title");
    formNode.setAttribute("type", "text");
    formNode.setAttribute("name", `form_memo_collection[memos_attributes][${formNum}][title]`);
    formNode.setAttribute("id", `form_memo_collection_memos_attributes_${formNum}_title`);
    formList.appendChild(formNode)
  })
})
要素を作ってappendする
jQueryのときは、appendメソッドがありました。jQueryであれば以下のようになると思います。
$('.memos-form__titles').append(`
  <input type="text" name="memo" id="memo_${num}">
`)
JavaScriptにはappendChildというメソッドがあるようです。これを使用するにはcreateNodeでNodeを作成、setAttributesでプロパティを設定する必要があります。
document.addEventListener("DOMContentLoaded", function () {
  const addMemoBtn = document.getElementsByClassName("add-memo-form-btn")[0]
  const formList = document.getElementsByClassName("memos-form__titles")[0]
  let formNum = 0

  addMemoBtn.addEventListener("click", function() {
    formNum += 1
    const formNode = document.createElement("input");
    formNode.setAttribute("class", "memos-form__title");
    formNode.setAttribute("type", "text");
    formNode.setAttribute("name", `form_memo_collection[memos_attributes][${formNum}][title]`);
    formNode.setAttribute("id", `form_memo_collection_memos_attributes_${formNum}_title`);
    formList.appendChild(formNode)
  })
})
まとめ
基礎の基礎ですが、jQuery使っていた身としては悩みどころが多かった気がします。